In 3D graphics, achieving nice, crisp, pretty images often means bringing together two key concepts: antialiasing and post-processing. Antialiasing smooths out the jagged edges that appear when rendering geometry, while post-processing adds visual effects like bloom or ambient occlusion. Both are essential for high-quality visuals, but they don’t always play well together.
In this article, we’ll look at the relationship between these two techniques. We’ll explore why they sometimes clash, and how to achieve crisp images even when using post-processing effects.
Let’s use a simple scene to see the effects up close.
You can also follow along with the live demo!
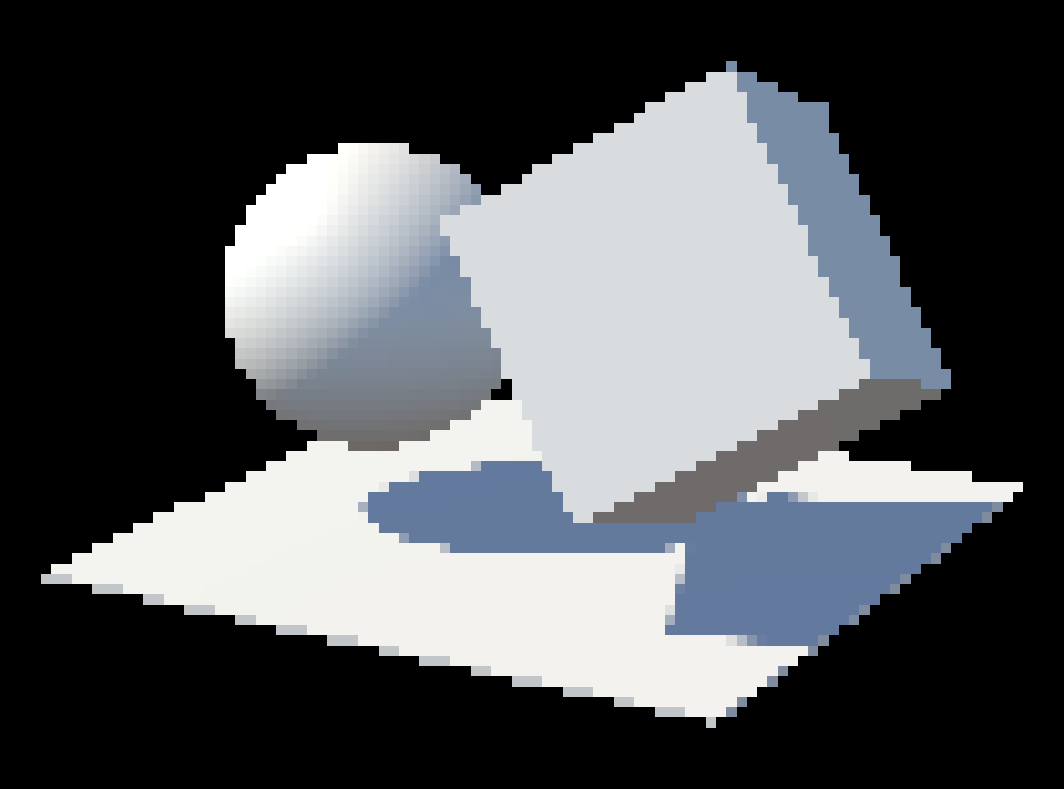
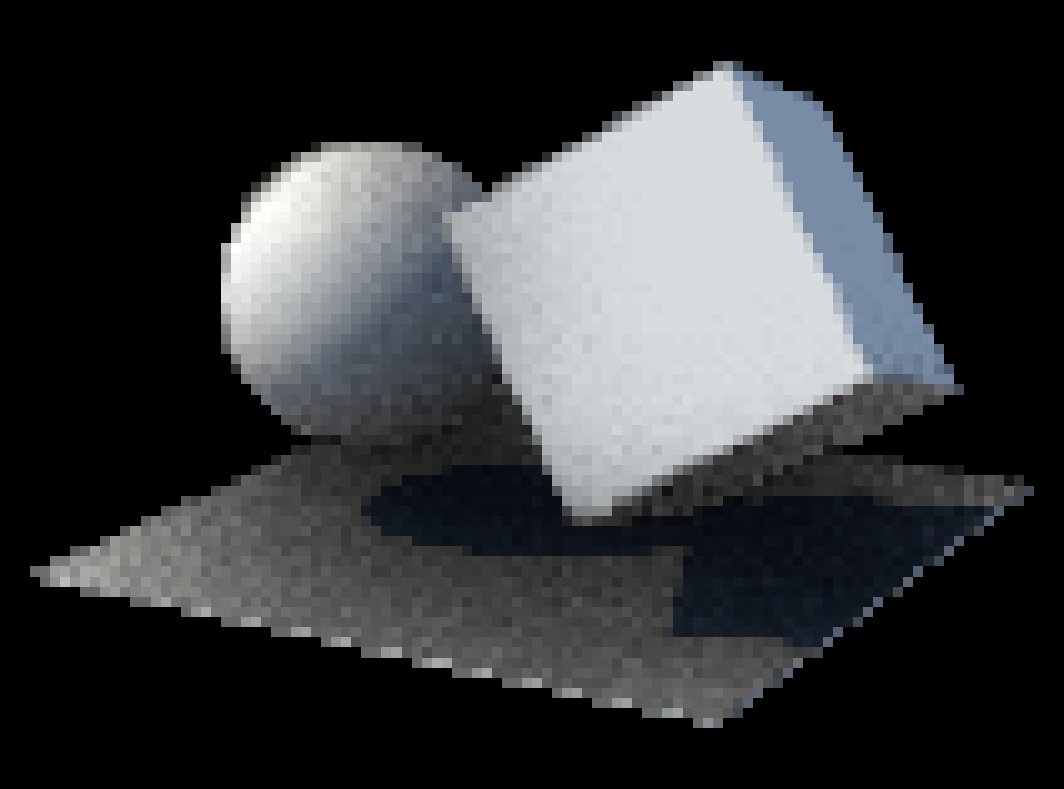
Here’s our demo scene with antialiasing turned on.

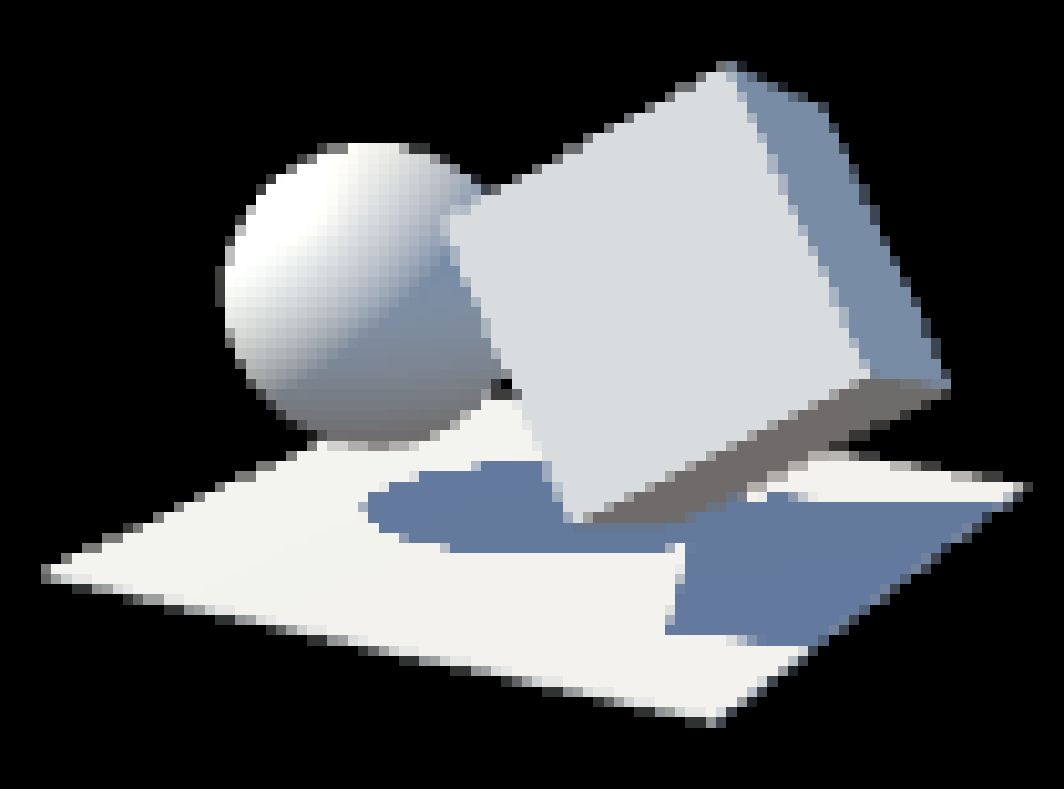
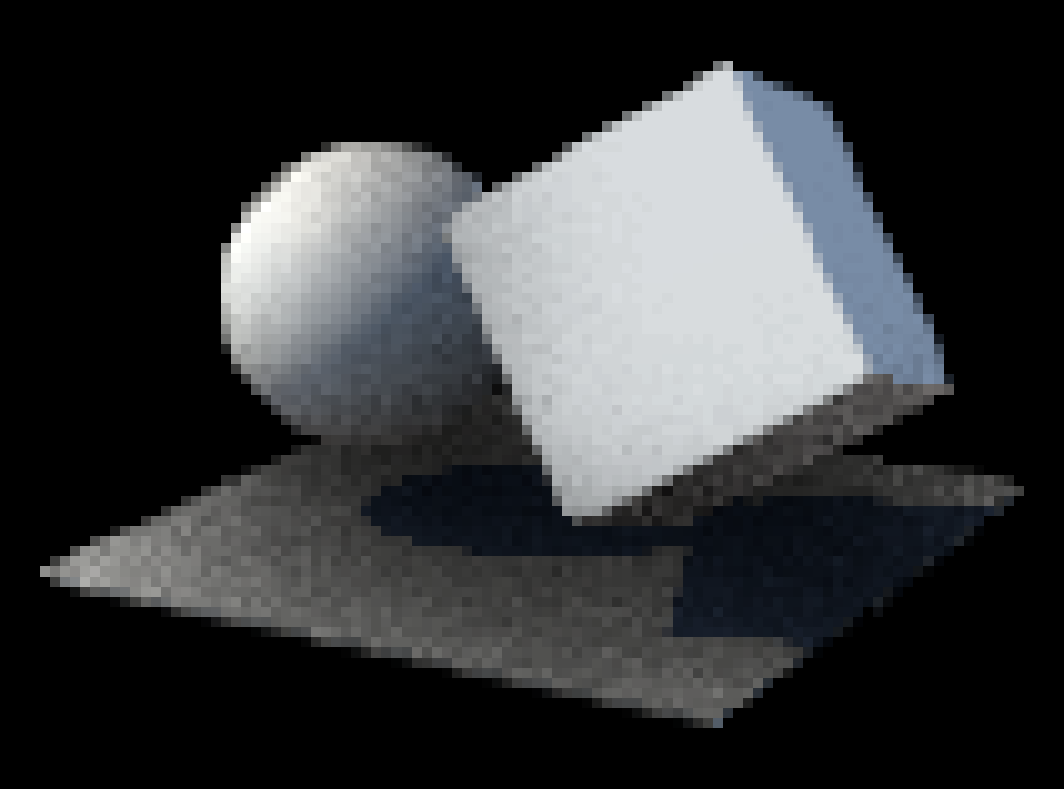
And here it is with antialiasing turned off.
See a difference? Probably not! At high resolutions, aliasing is less noticeable. But the aliasing artifacts are still there, especially when things are in motion. To make the problem more obvious, let’s zoom way in.
Aliasing vs. Antialiasing
In computer graphics, aliasing refers to the jagged, stair-step lines that appear on the edges of rendered objects. This happens because we’re trying to represent smooth, continuous lines on a grid of square pixels.
Here’s our scene at a very low resolution without any antialiasing. Each pixel along the edges is either fully rendered or not rendered at all, creating a jagged appearance.

The most common solution is Multisample Antialiasing (MSAA). It’s a hardware-level technique where the GPU samples multiple points within each pixel and averages the colors. This creates smoother transitions along edges.
Here’s the same scene with 4x MSAA. Notice how the edges are now “blended” and much smoother.

Depending on the engine you’re using, you might have control over the sample count for MSAA. Typically, you can choose from 0x (no MSAA), 2x, 4x, or even 8x. Higher sample counts yield smoother edges but require more GPU power, and your GPU might not support all options.
In WebGL, you can’t directly choose the sample count. The underlying WebGLRenderingContext allows enabling or disabling antiliasing, but the actual sample count is determined by the browser and device capabilities. In WebGPU, the sample count can be directly chosen.
Post-Processing, Depth and Normal Passes
Post-processing effects are filters applied to the entire scene after it has been rendered. Think of them as filters for your 3D world, adding effects like bloom, depth of field, color grading, and screen-space ambient occlusion (SSAO).
Normally, your scene is rendered directly to the screen. When post-processing is active, the pipeline changes:
- The scene is rendered to an offscreen texture instead of the screen. This offscreen texture also supports MSAA.
- One or more post-processing “passes” read from that texture, apply an effect, and write the result to another texture.
- The last pass writes the final image to the screen.
The problem is now that many advanced effects, like screen-space ambient occlusion (SSAO), need accurate depth and/or normal data for every pixel to work correctly. As MSAA works by averaging colors along edges, if we were to average depth values in the same way, a pixel on an edge would end up with a depth that’s neither near nor far, but “somewhere in between”. This breaks effects that rely on precise depth information, as you’re effectively blurring the depth data.
Because of this, depth and normal passes are rendered without MSAA. This causes aliasing to creep back in, specifically within the parts of the image generated by the post-processing effect.
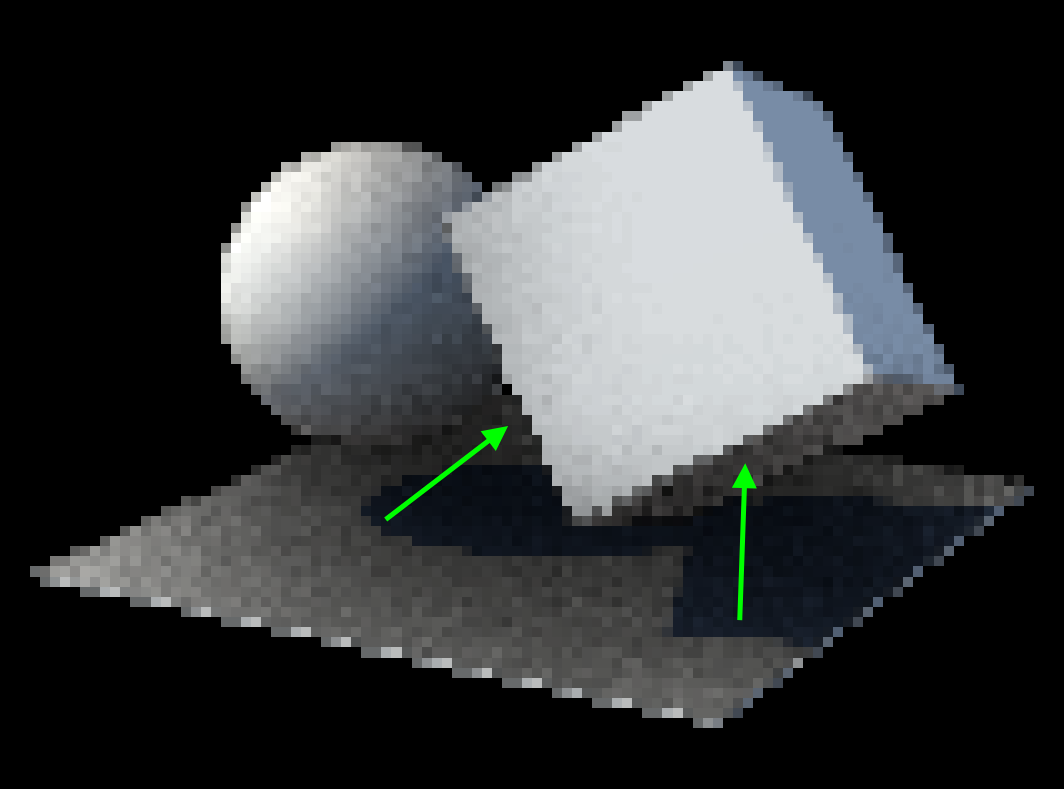
Look closely at the screen-space ambient occlusion under the sphere in this image. Even though the rest of the scene has MSAA, the occluded edge is jagged because it’s calculated from an aliased depth pass.
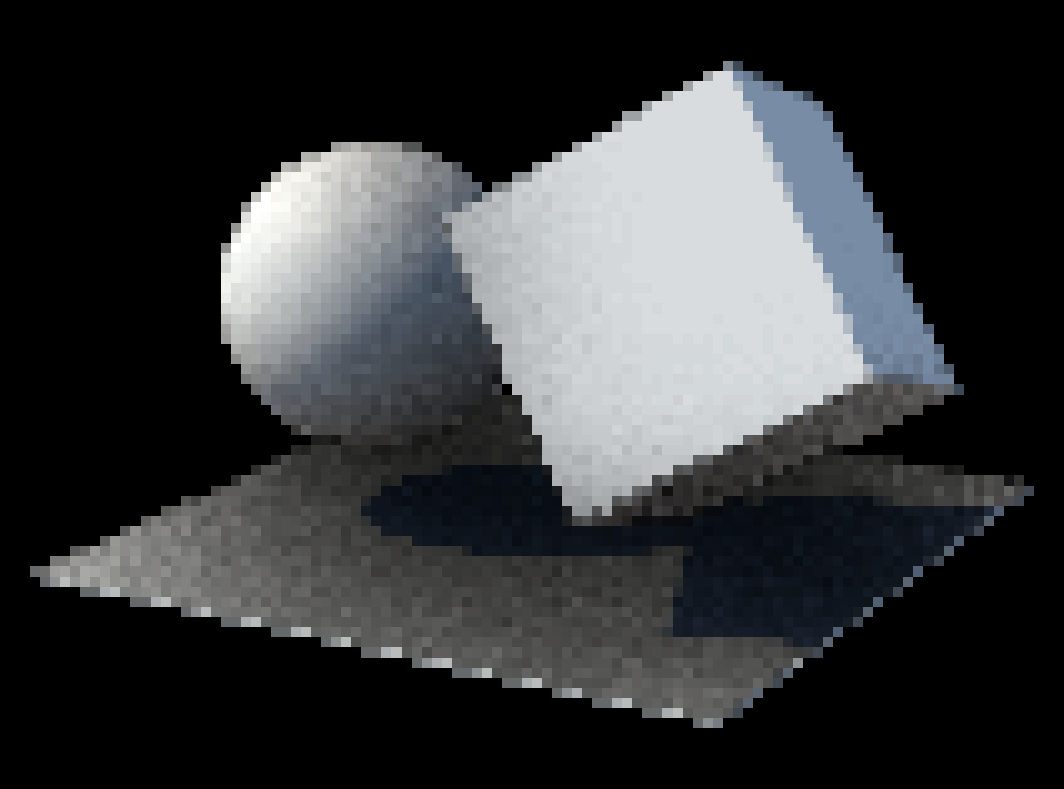
Since it’s hard to miss when you don’t know what to look for, here’s an annotated version of the same image, pointing at the SSAO artifacts:
Adding antialiasing as post-processing pass
If we can’t use MSAA on our data passes, what can we do? One answer that a lot of engines use is to apply antialiasing as a post-processing effect itself! We disable MSAA during the main render, run all our other post-processing effects on aliased images, and then apply an antialiasing filter as the very last step.
There are several techniques for this, like FXAA (Fast Approximate Anti-Aliasing), TAA (Temporal Anti-Aliasing), and SMAA (Subpixel Morphological Anti-Aliasing). SMAA is a popular choice because it offers a good balance of quality and performance by intelligently detecting and smoothing edges in the final image. There are also various presets to choose from that trade quality for performance, usually by changing how edges are detected (from depth, from color or luminance, or a mix of both) and how the effect “looks around” each pixel to check for edges.
Here’s the same scene with SSAO, but this time with an SMAA post-processing pass enabled. The jagged artifacts on occluded edges are gone, and we have a clean, smooth final image. We do sacrifice some of the sharpness that MSAA provides, but the overall image quality is better than without any antialiasing.
Depending on your scene, it might still make sense to render the main scene with MSAA enabled, especially when you have fine details that benefit from it. SMAA can’t bring back “hidden” details that were aliased away in the original render. However, having MSAA enabled for the main pass can lead to artifacts where now antialiased color pixels don’t quite match the aliased depth pixels, which might lead to shimmering effects on edges, especially when post effects add high contrast based on depth.
Here’s the same scene with MSAA disabled but SMAA enabled. Notice how the edges are still smooth because of SMAA, but some fine details like the thin highlighted edge on the floor are lost. Games often disable MSAA in these cases, but geometry-heavy projects like realtime automotive or architectural rendering can still benefit from it.
Antialiasing and Post-Processing in Needle Engine
Needle Engine handles a lot of this complexity automatically. When you add a post-processing effect to your scene, Needle Engine creates a PostProcessingManager that manages the multi-pass rendering pipeline. This includes handling MSAA, depth and normal passes, and ordering effects so that they make sense. Under the hood, the manager uses three.js’s EffectComposer and the postprocessing package.
Enabling SMAA
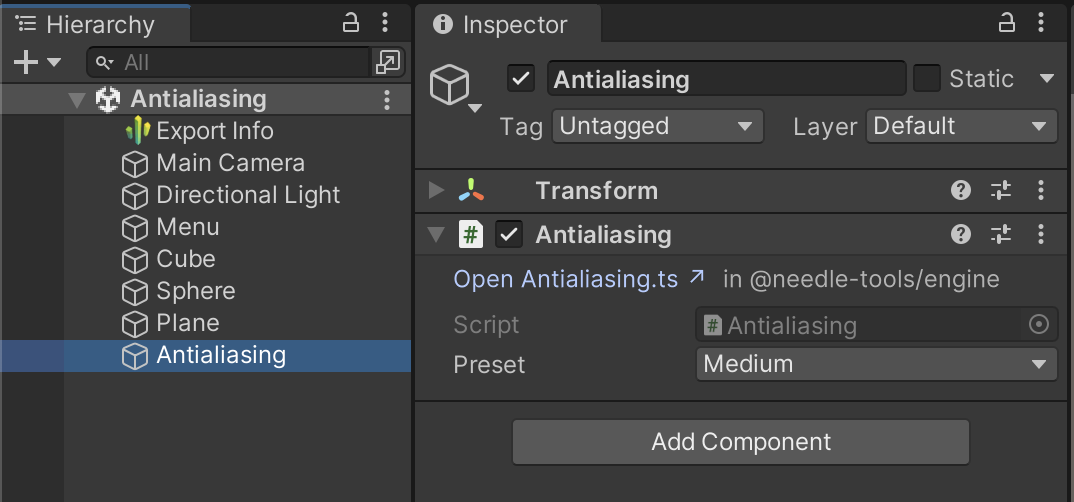
To solve the artifact issue with effects like SSAO, you can add the built-in Antialiasing component, which enables antialiasing as post effect (SMAA).
You can add the Antialiasing component to any GameObject, either in the editor or via code. This will apply SMAA late in the rendering pipeline, after other post-processing effects that require depth or normal data.
Here’s how to add it in Unity:
Here’s how to add it in code:
import { GameObject, PostProcessingManager, Antialiasing } from "needle-engine";

// Ensure we have a PostProcessingManager
const manager = GameObject.findObjectOfType(PostProcessingManager) ||
    context.scene.addComponent(PostProcessingManager);

// Add the Antialiasing component to enable SMAA
manager.gameObject.addComponent(Antialiasing);
Workflow with the Unity integration
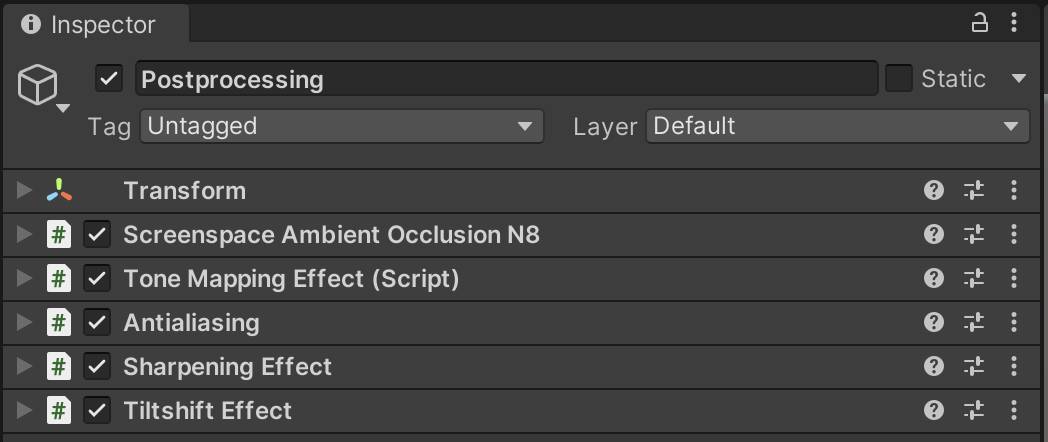
When you work in Unity, you can directly use Unity’s Volume system to add post-processing effects. The Volume is turned into a PostProcessingManager on export, and most effects (like Bloom, Tonemapping, or Depth of Field) assigned to the Volume are also available in Needle Engine.
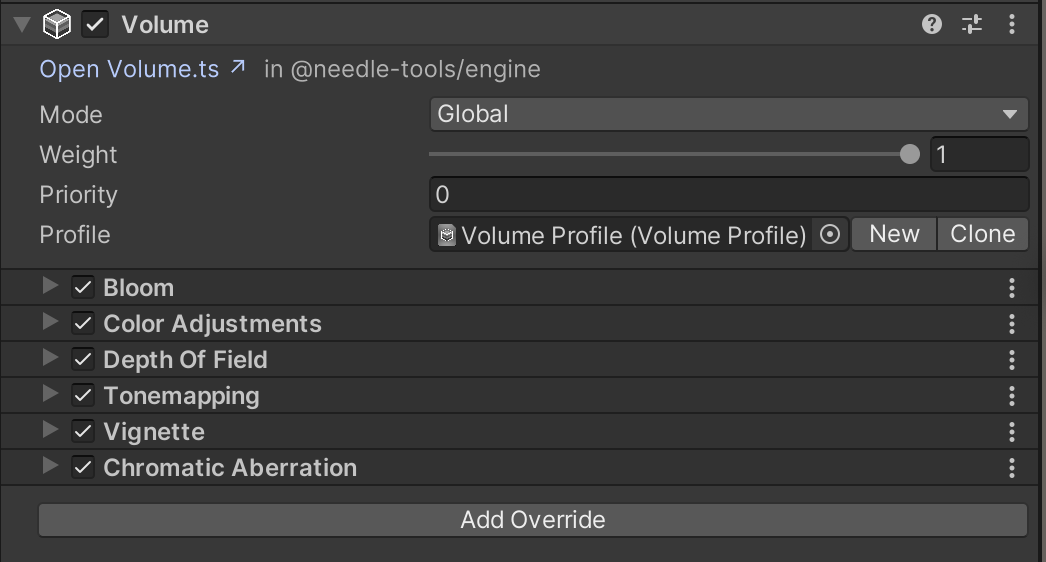
Some effects have more options, or different options, in Needle than in Unity. Those are available as individual components that you can add to your scene. They can be on the same object that has the Volume component, but they don’t have to. Such components are:
- Screen Space Ambient Occlusion N8: A high-quality ambient occlusion effect.
- Antialiasing: This effect enables post-processing antialiasing, and more specifically, SMAA. You can adjust the quality level.
- Sharpening: A sharpening effect that enhances the contrast of edges in the image.
- Tone Mapping: Has more options than Unity’s built-in tonemapping effect. Specifically, the AgX and Khronos-Neutral tonemapping curves are available in Needle, which have better quality and color reproduction than ACES (Unity’s default).
- Tilt-Shift Effect: A post-processing effect that simulates a tilt-shift lens, creating a miniature effect by blurring parts of the image.
Workflow with the Needle Engine API
When you add any post-processing effect, Needle Engine creates a PostProcessingManager, also called a Composer. This object manages the entire multi-pass rendering pipeline.
By default, the Manager renders the main scene pass with MSAA, and does not apply SMAA. You can adjust or disable the MSAA sample count on the Manager. If you don’t change it, Needle Engine adjusts the sample count based on the device capabilities and performance, defaulting to 4x MSAA.
import { GameObject, PostProcessingManager } from "needle-engine";

// Ensure we have a PostProcessingManager
const manager = GameObject.findObjectOfType(PostProcessingManager) ||
    context.scene.addComponent(PostProcessingManager);

if (manager) {
    // Set a specific sample count (0, 2, 4, 8...). Default is 'auto', which usually ends up being 4x MSAA.
    manager.multisampling = 4;
}
Higher sample counts lead to a smoother image, but they also require more processing power. Here’s a comparison between 0x (no MSAA), 2x, and 4x MSAA:


Adding a Custom Post-Processing Effect
Needle Engine uses the postprocessing library under the hood. That makes it relatively straightforward to add your own custom effects by writing shader code.
You can create your own effects by extending the PostProcessingEffect class. Multiple effects are automatically merged into shader passes for better performance.
Here’s a simple effect that applies posterization and a vignette.
import {
    PostProcessingEffect, PostProcessingManager,
    registerCustomEffectType, onStart, GameObject } from "needle-engine";
import { Effect } from "postprocessing";

export class PosterizeAndVignetteEffect extends PostProcessingEffect {
    static name = "PosterizeAndVignetteEffect";

    get typeName() { return PosterizeAndVignetteEffect.name; }

    onCreateEffect() {
        return new Effect(PosterizeAndVignetteEffect.name, `
            void mainImage(const in vec4 inputColor, const in vec2 uv, out vec4 outputColor) {
                // Posterize the colors
                vec4 posterized = round(inputColor * 3.0) / 3.0;

                // Add Vignette based on distance from center
                float vignette = smoothstep(0.5, 0.0, length(uv - vec2(0.5)));
                outputColor = vec4(posterized.rgb * vignette, inputColor.a);
            }
        `);
    }
}

// Register the custom effect
registerCustomEffectType(PosterizeAndVignetteEffect.name, PosterizeAndVignetteEffect);

// Add the effect at startup
onStart(context => {
    const manager = GameObject.findObjectOfType(PostProcessingManager) ||
        context.scene.addComponent(PostProcessingManager);
    manager.addEffect(new PosterizeAndVignetteEffect());
});
For more details, check out the postprocessing library documentation.
Understanding the post-processing effect stack
Needle provides numerous debug flags. To see what’s happening under the hood with your effects, just append ?debugpost to your project’s URL. The browser console will log detailed information about how passes are created, merged, and applied.
You can open the demo app with the ?debugpost?flag active, and then check out the browser console to see what happens when you enable or disable effects, change the MSAA sample count, or add custom effects:
Open the demo app with debug flag
A note about color spaces and tonemapping
Another topic related to post-processing is tonemapping. Tonemapping refers to the process of converting high dynamic range (HDR) colors to a format suitable for display on standard monitors, which typically use a limited dynamic range. There are various tonemapping algorithms, like AgX, ACES, and Khronos-Neutral, each with its own characteristics.
How tonemapping is applied depends on whether you’re using post-processing or not, and is also handled differently depending on the engine you’re using. For example, in Unity tonemapping is always applied in the postprocessing stack, which makes it hard to use for performance-sensitive applications like VR.
In three.js and Needle, tonemapping can be applied directly in each object’s shader, avoiding extra render passes. This makes rendering more efficient when no post-processing effects are used – pixels go straight to the screen in the display color space (like sRGB).
When post-processing is active, tonemapping is applied once in the final pass. All rendering then happens in linear color space to ensure calculations are accurate, and tonemapping converts the image to the correct display color space at the end.
One caveat of the fragment-tonemapping approach is that transparent objects are blended in “tonemapped colors”, which leads to slightly different results compared to blending in linear space. The post-processing approach is thus more accurate, since it blends in linear space. However, this is usually not very noticeable unless you’re working with complex transparency setups.
A note about the rasterization pipeline
Why do the jagged edges appear in the first place? The answer lies in the rasterization pipeline, which is how 3D graphics are rendered to a 2D screen.
When a 3D object is rendered, the GPU converts its geometry into pixels on the screen. Geometry is made up of triangles. First, these triangles are projected on the 2D screen. They’re still “vectors” at this point, not pixels. The GPU then determines which pixels on the screen are covered by each triangle, through a process called rasterization. Rasterization basically checks for each pixel whether it falls inside or outside the triangle. Only pixels that are inside the triangle are then colored by the triangle’s fragment shader.
So the rasterizer itself just answers “yes” or “no” for each pixel for the question of whether it is covered by the triangle. Now, what multi-sample antialiasing does is to sample multiple points for the pixels that are close to the edges of the triangle. Depending on the sample count (2, 4, 8, …), a pattern of samples is taken within each pixel. These samples are then averaged to produce a final color for the pixel, which helps to smooth out the jagged edges.
Summary
Combining good-looking antialiasing with post-processing effects can be tricky, but there are ways to make it work. By applying SMAA as a post-processing effect, you can achieve smooth edges even when using effects that require depth or normal data.
Needle Engine simplifies this process by automatically managing the rendering pipeline and providing built-in components for antialiasing.
Check out the Antialiasing and Postprocessing Demo to see these techniques in action, and feel free to experiment with different MSAA settings and post-processing effects.